.
.
Blogger.com for beginners
Blogger.com for beginners -Tutorial 10 [custom facebook like box ]
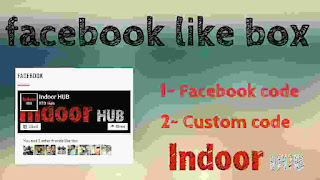
hello everyone welcome to blogger.come for beginners in this tutorial we'll add a facebook like box widget in our blog so at this time I assume that you already have a Facebook fan page for your website or blog development Facebook , Twitter, are the two basic strong promotion portal so you can get tons of followers and page traffic.
If you don't have just go to Facebook site and create your own blog fan page so let's do this so go to Facebook documentation go to this developers.facebook.com then document and scroll down let's find a facebook like box.
Go to social plugins page plugins then copy your fan page URL and paste the URL so as you see it appeared my facebook fan page so let's modify according to your need.
Blogger.com for beginners -Tutorial 9 [ Email subscriber from google feedburner ]
Hi guys welcome to blogger.com for beginners in this tutorial we will add important widget in our blog the subscribe by email or email subscription the blogger email subscription handle by feedburner that Google.com so as you see this page handle by email subscription in our blog it appears black so if I created a email subscription we get it appear the feed title here so let's do that so let's add a gadget email subscription where are you followed by email so let's replace as you want and save let's go back to dashboard this as you see the subscribe by email appeared.
 |
| Step 1 |
 |
| Step 2 |
 |
| Step 3 |
let's switch my feeds refresh and as you see the test travel or feed displayed when you guys create a new post and publish they will receive a notification in his own email.
 |
| step 4 |
so see you next blog tutorial until then see you and don't forget to share and subscribe to my email list.
Blogger.com for beginners -Tutorial 8 [custom search box ]
Hi everyone welcome for blogger.com for beginners after a long time sorry for that. I was so busy this tutorial about adding the search box widget and custom search box so let's switch back to admin dashboard then in layout.
so let's add a search let's find a search box and remove this extra text here and click say and click Save arrangement and reload.
Go to your blogger home page the search box has appeared so type something related to your post and test the search results appear in the left sidebar there's
some cases the search the default search widget are not work but in my case it work but if that happen if the default search widget has not work there have a great solution for that the great solution for that is to replace the HTML version of the search so let's try the HTML version.
For that go to dashboard then layout and again the gadget and add this HTML Javascript widget so copy the bellow little code snippets and past in the HTML Javascript then save.
the Search Widget the HTML site more efficient than the default search box two version are look different in the search result but I like this look HTML version than the default search widget because the HTML version has high search accuracy then the default also I like the templet of the widget you see the URL are looks different when you search so we will stick the HTML version it's up to you but I will remove this filtered version.
the Search Widget the HTML site more efficient than the default search box two version are look different in the search result but I like this look HTML version than the default search widget because the HTML version has high search accuracy then the default also I like the templet of the widget you see the URL are looks different when you search so we will stick the HTML version it's up to you but I will remove this filtered version.
Thank you guys see you on the next post untill stay tuned for more ....! blogger.com for beginners
Blogger.com for beginners ---- Tutorial 7 [ Advance theme settings/customisations ]
Hello guys in this tutorial we will edit the template in advance so let's switch back to blogger template designer so let's click advanced so in advance there are a list of options.
here you can edit the template color for example page text you can choose a different font if you want impact so as you see the text our changes to impact font so I don't like it Times Roman I don't like it too I think the Arial is good for me like that or you can clear advance change to page text if you want to back to default I think this text is good so you can change the color.
let's go to background you can able to change the background if you don't have set the background image so the changes are not seen because you already have a background image.
so the background links you can change the links through here this color link correspond to this sling color if you want to change just choose any color to your requirement.
Let's go to blog title blog title is correspond to this area so you can change the Font to impact I think time new Roman is good so i will add here and you can change the color here.
Let's go to blog description you can change the color too but I think black is fine for now because we change this template in the future
Then let’s go to Tabs text where you can edit the menu tab don't and colour according to your needs.
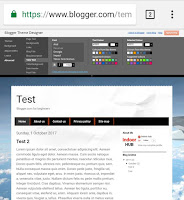
Now the tabs background where you can change your menu blogger menu background colour.
The Date header where you can change your Post date and time colour according to the your theme in my theme I keep it as white which suits my theme.
The post title when you can change the blogger post title font and colour.
Gadget text same here also font and colour.
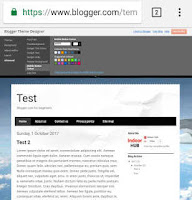
The last two are the mobile button color you can see this changes in the desktop version but you can able to see in the mobile version I mean mobile device.
So the last one are add CSS you can add here at custom CSS if you have a knowledge in CSS you can put through the white box.
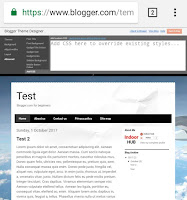 so after the changes you like to let's click to apply to blog.
 so after the changes you like to let's click to apply to blog.
Blogger.com for beginners ---- Tutorial 6 [ Add blog description ]
Hi everyone in this post i will teach you how you can add a blog description or tagline.
The tagline or blog description. Which will appear below the title blog so let's login to blogger.com and blogger dashboard go to settings click Edit the description.
I will paste my example tagline guys. But you will do your own tagline in your blog but this is a tutorial so, I am pasting dummy but you give your trending and own tagline for your blog.
So go to your blog and you can see your description or tagline are displayed in the below the title blog.
so see you in the next post. Stay connected blogger.com for beginners.
Blogger.com for beginners ----> Tutorial 5 [ creat a page and menu ]
Hi guys in this tutorial blogger.com for beginners. we'll create a page. Why we create a page the page and post are different the custom like also differ here page doesn't have the tags, so let's get started so let's click the page button in the blogger dashboard.
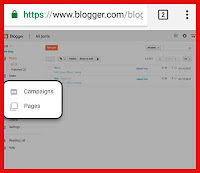
The important pages for you blogger or website it's mandatory to get more traffic and people to know what is your website or blog about.
- About me
- contact us
- privacy policys
- sitemap
First let's add an about page it's an example so dummy text but you guys have to write your own I will but a dummy text this is a temporary text guys this tutorial purposes so obviously you will replace this if you do a real blog and click publish to publish the post.
let's add one more new page privacy policy copy copy the dummy text again paste and hit publish another one contact us contact us and one more one less more our site map hit publish.
so let's switch back to blog site. But non of the page appears because you will need to configure in the widget area.
switch back to the blogger panel click the layout and this page guys little add widget here later me new Facebook , Twitter plugin for this blog we will add a page in the highlight box so let's click that by the way this widget our default by template if you if you buy a template or download a template from the Internet it will be different so you have to arrange accordingly to you need we will rearrange this widget later in this course blogger.com for tutorial so so let's add a page click on the highlight box in the pic.
Select pages tick mark all save a the arrangement according to your need them save.
Then go back to your blogger then you can see your home,about us and the rest are displayed so click and verify that obviously it will work
we'll replace the contact form and site map later in this blogger.com for beginners we will replace this a post also so I hope you guys understood if you have any questions please comment below. Don't forget to share my post so I get more motivation to create a good contents.
Subscribe to:
Comments (Atom)
. .

-
Hi guys welcome to blogger.com for beginners in this tutorial we will add important widget in our blog the subscribe by email or email subsc...
-
Hi everyone and welcome to this tutorial blogger.com for beginners so let's get started to create our blog so first go to blogger.com...
-
Hi everyone in this post i will teach you how you can add a blog description or tagline. The tagline or blog description. Which will appear...
